How to Measure MTB SAG Correctly | MTB Suspension Guide

Setting the correct SAG is one of the most important steps in achieving a balanced mountain bike suspension setup.
Whether you ride XC, Trail, Enduro or Downhill, proper SAG helps your suspension work within its intended range, improving traction, comfort, control and rider confidence.
The good news is that measuring SAG is relatively simple. The bad news is that many riders measure it incorrectly, leading to suspension settings that don’t reflect how the bike actually behaves on the trail.
In this guide, you’ll learn how to measure MTB SAG correctly and avoid the most common mistakes.
What You’ll Need
Before you begin, gather the following:
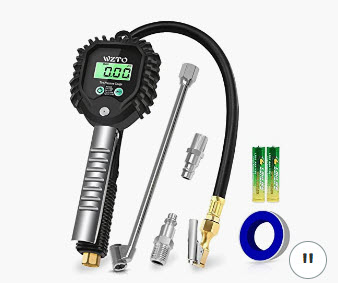
- A shock pump
- A measuring tape
- The O-ring installed on your fork and shock (or a zip tie for the fork)
- Your normal riding gear

While not essential, having a friend help can make the process much easier and improve measurement accuracy.
Step 1: Wear Your Normal Riding Gear
This is one of the most overlooked parts of the process.
SAG should always be measured while wearing the same equipment you normally ride with, including:
- Helmet
- Shoes
- Hydration pack
- Tools and spare parts
- Protective equipment
Even a few extra kilograms can significantly affect suspension position.
If you set SAG without your normal riding gear, the results won’t accurately represent your riding conditions.
Step 2: Cycle the Suspension and Reset the O-Rings
Before taking any measurements, compress and release the suspension several times.
This helps overcome seal friction and allows the suspension to settle naturally.
Then move the O-rings on the fork and shock so they sit against the dust seals.

You are now ready to measure.
Step 3: Get Into Your Neutral Riding Position
Carefully get on the bike and adopt a neutral riding position.
Try to:
- Keep your weight centered
- Stand on the pedals
- Look forward
- Avoid grabbing the brakes unnecessarily
If possible, have a friend hold the bike while you balance naturally.
Many riders make the mistake of leaning against a wall or post, which shifts body weight and alters the measurement.
The goal is to replicate your normal riding posture as closely as possible.
Step 4: Carefully Dismount the Bike
Once the suspension has settled, carefully step off the bike without bouncing or further compressing the suspension.
This is often the trickiest part of the process.
Any additional movement can affect the position of the O-rings and introduce errors into the measurement.
Take your time.
Step 5: Measure the SAG
Measure the distance between the dust seal and the O-ring.
This is your actual SAG measurement.
For example:
- 35 mm of fork compression
- 42 mm of rear wheel movement
On its own, this number doesn’t tell you much.
To know whether your SAG is correct, you need to compare it to the total suspension travel.
Convert Your Measurement Into a Percentage
SAG is normally expressed as a percentage of total travel.
The formula is:
SAG (%) = Measured SAG ÷ Total Travel × 100
For example:
- Fork travel: 160 mm
- Measured SAG: 35 mm
35 ÷ 160 × 100 = 21.9%
Rather than doing the maths manually, you can use our free MTB SAG Calculator to instantly calculate recommended SAG values for your bike and riding style.
Common MTB SAG Measurement Mistakes
Even experienced riders sometimes make these errors.
Measuring Without Riding Gear
Always measure SAG with the equipment you actually ride with.
Leaning Against a Wall
This changes weight distribution and can dramatically affect the results.
Taking Only One Measurement
Repeat the process several times and use the average value.
Not Cycling the Suspension First
Seal friction can influence the position of the suspension and produce inconsistent measurements.
Chasing Numbers Instead of Feel
SAG recommendations are starting points, not absolute rules.
The best setup is the one that delivers the desired balance of support, traction and comfort on the trail.
Rear Wheel Travel vs Shock Stroke
When measuring rear SAG, there is an important detail that many riders overlook.
Most SAG recommendations are based on rear wheel travel, not simply the amount of shock stroke used.
Because every suspension design uses a different leverage ratio, the same shock displacement can produce different amounts of wheel movement depending on the bike.
For this reason, the most accurate way to measure rear SAG is by tracking actual rear wheel movement rather than relying solely on shock stroke.
Tools such as the Slacker Virtual Fender make this possible by measuring wheel travel directly, providing a more accurate representation of how the bike sits within its suspension travel.

Does this mean measuring shock stroke is wrong?
Not at all.
For most riders, measuring shock stroke and using standard SAG recommendations will get very close to an ideal setup.
However, if you’re looking for maximum accuracy and consistency, measuring actual rear wheel travel is the preferred method.
This becomes particularly important on modern trail and enduro bikes where suspension kinematics vary significantly between designs.
What to Do After Setting SAG
SAG is only the first step in suspension setup. If your SAG is correct but your bike still doesn’t feel right, the problem may be elsewhere. Read Why Your MTB Feels Bad Even When SAG Is Correct to understand what to check next.
Once your SAG is correct, the next areas to evaluate are:
- Rebound damping
- Compression damping
- Volume spacers
- Front-to-rear balance
- Bike geometry
These adjustments can have just as much influence on ride quality as SAG itself.
Want to Learn More About Suspension Setup?
Correct SAG provides a solid foundation, but it’s only one piece of the puzzle.
The MTB Suspension Setup Guide explains how to adjust rebound damping, compression damping, air pressure, volume spacers and overall suspension balance using a practical, step-by-step approach.
Whether you’re trying to improve traction, comfort, support or confidence on the trail, understanding how each adjustment works can completely transform how your bike rides.